
This blog is about how to turn HTML content into useable data in Power Automate or Logic Apps using Low Code/No Code techniques.
Introduction
There isn’t a native web scraping action in Power Automate/Logic Apps that I know of. If there was it would be pretty tricky to set up. However, you can piece together a few native connectors and elements of the Power Platform to make a pretty clean job of it yourself without being a code whizz.
This blog will show you how. It’s the result of a few hours of messing around and getting frustrated so hopefully it’ll help someone avoid that.
Ingredients:
- An Azure SQL database
- Power BI Desktop or a recent version of Excel.
- A premium Power Automate license, or access to an Azure subscription (Logic Apps)
Warning: This isn’t for the faint hearted, and if you’re a full code developer you would just do this in an azure function or something. Anyway, here’s the low-code way.
The basic overview of it is this:
- Use Power BI Desktop to connect to the web page and select the table you want.
- Perform any transformations you want
- Use a Flow or Logic App to save the raw HTML response from the website into a SQL table
- Use Transform Data using Power Query action to construct a table from the text in the SQL table
Method
Power Query (M) language has a built-in function for parsing HTML into tables, the function is called Html.Table. The documentation for this function for a non-frontend dev is pretty much incomprehensible, but thankfully Power BI and Excel Power Query editors give you a nice GUI for selecting any tables found in the input text.
When you add a new data source in Power Query and choose Web, after connecting to the URL you’re shown a list of tables.
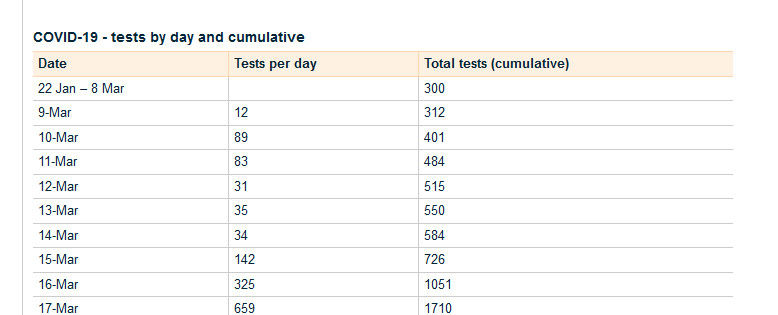
In my example I’m going to use the NZ Ministry of Health Coronavirus information. Not for any reason other than it’s a website with a few tables on it. The same technique can be used for any webpage.
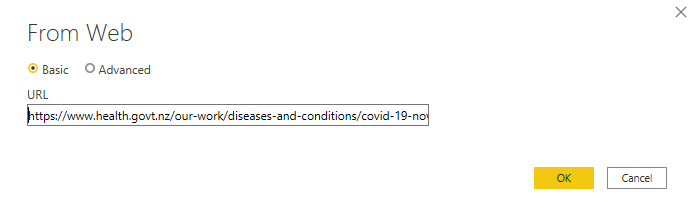
After entering the web site details and going through Authentication (Anonymous in this case) you get the Navigator window:

I’m picking tests by day and cumulative here, for the purpose of an example.
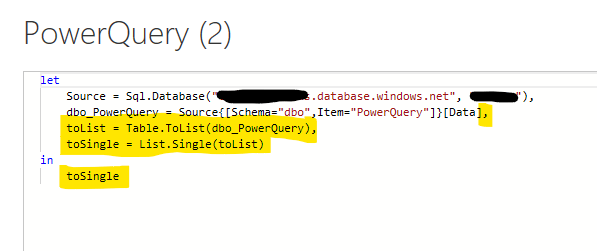
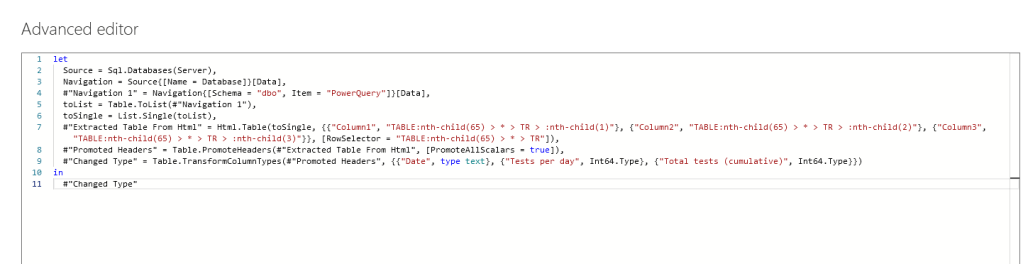
When the query has loaded you can go into Advanced Editor to see the M code:
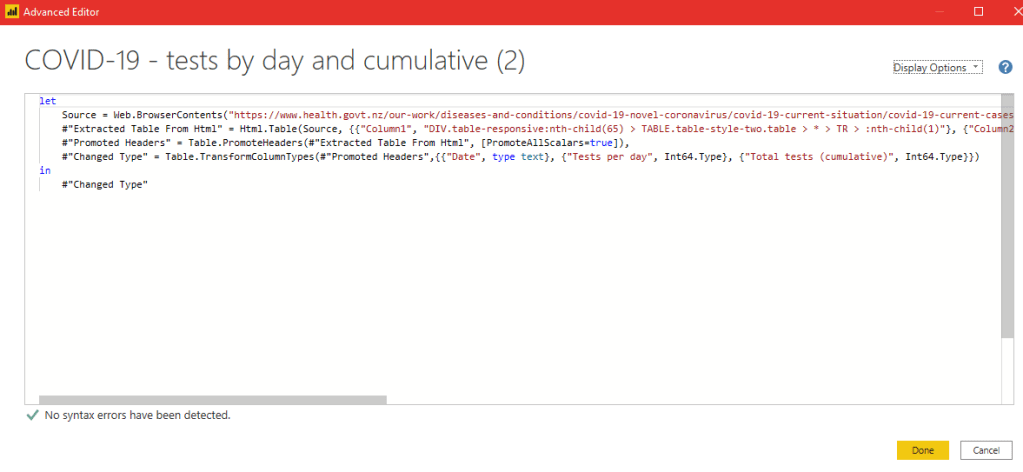
You can see the Source variable is the output of Web.BrowserContents.
Web.BrowserCountents is a pretty clever function really. It doesn’t just do an HTTP GET for the URL and deliver the result, it actually behaves like a browser and constructs the DOM tree and processes CSS etc., so what you get out of that function is not the same as what you get from a raw HTTP GET to the same URL.
The next action is the Html.Table function that parses the output to produce a table you can further process downstream in the query.
Now we know the raw response from the HTTP GET can’t be processed by the exact same Html.Table function parameters as seen above, because the Web.BrowserContents function is doing stuff to the response we can’t replicate in a flow or Logic App.
Therefore we stop in Power Query right now, leave it open with that query (we need it later) and get into Power Automate.
In Power Automate, use the HTTP action to GET the URL
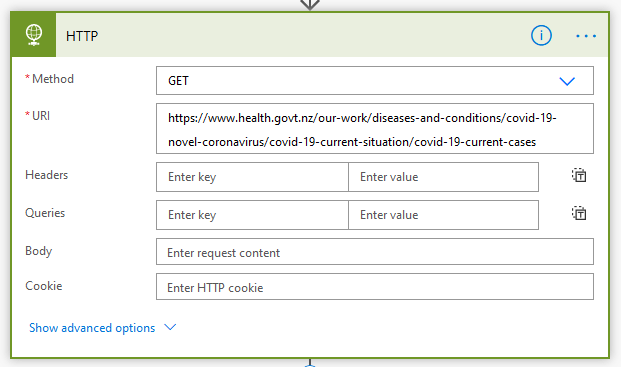
This produces a different output than Web.Contents so we can’t just push this into a database to process with Power Query Online using the same M code the Navigator window generated earlier – we have to do a bit of work in PBI desktop to change the parameters of Html.Table to work with the different HTML data.
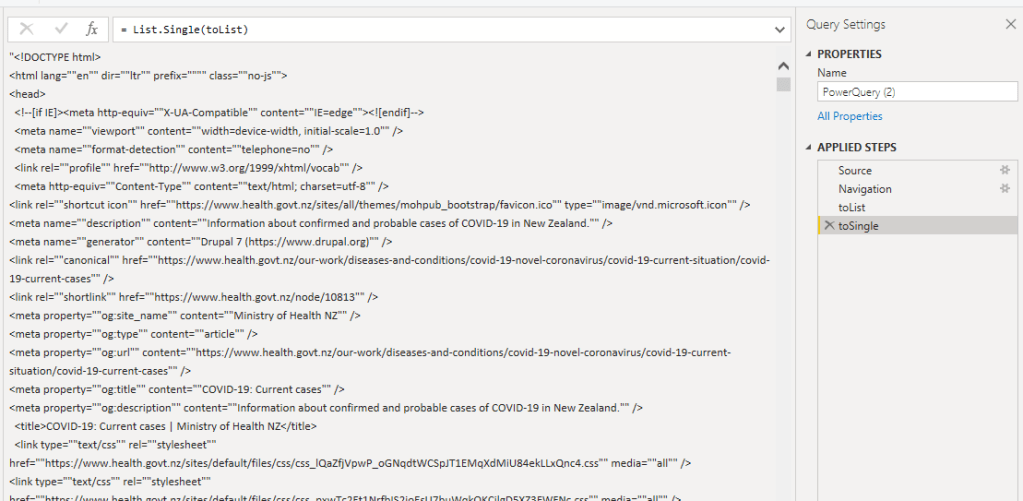
Firstly, sink the output of this HTTP GET into a single column table. In my case I’m truncating the table first so we only ever have one row.

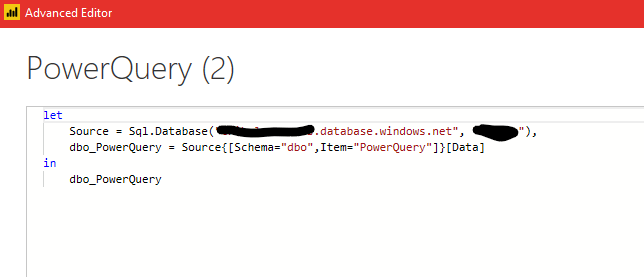
Now in PBI Deskop add a SQL data source. Pick the table you just sunk the HTML into:

Select it and click OK. When the query has loaded you can click Advanced Editor and see what’s happened:
Now we need to add a few steps to turn this single row, single column table into a text string. In Advanced editor, add a couple of lines:
All going well you’ll have the raw HTML text in the editor window:
Now go back to the Web source query we did earlier on.

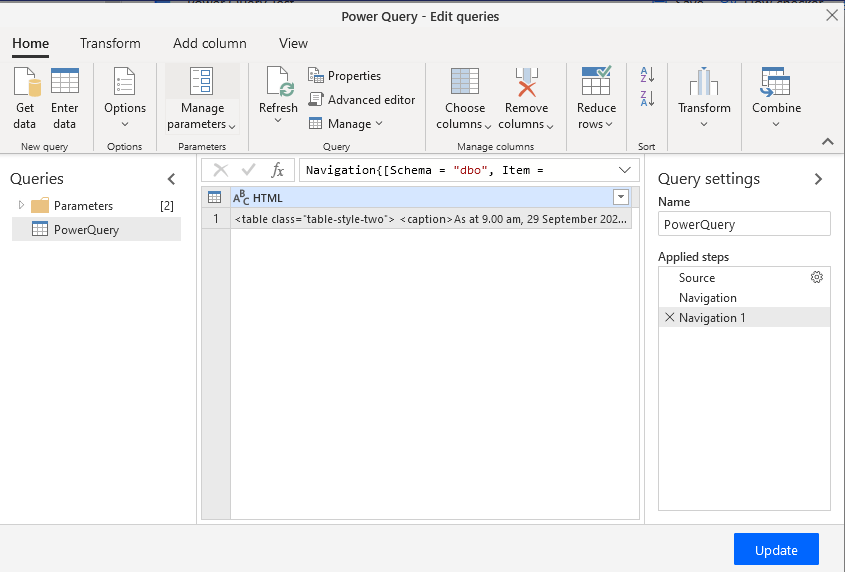
Copy this query from #”Extracted Table From Html” onwards.
Now, back to the SQL table, PowerQuery (2) in my case, where we just converted the table to text. Paste the copied part of the query in, add a comma and change the source text in Html.Table to the name of the step above it.
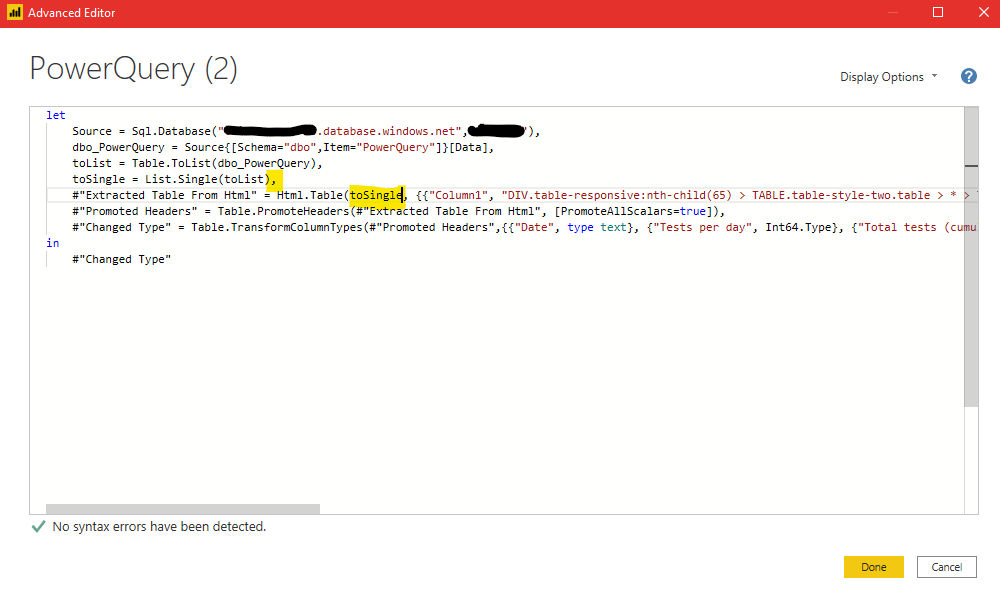
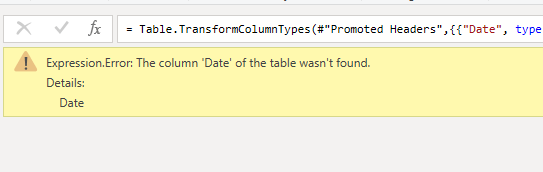
You’ll see an error like this:
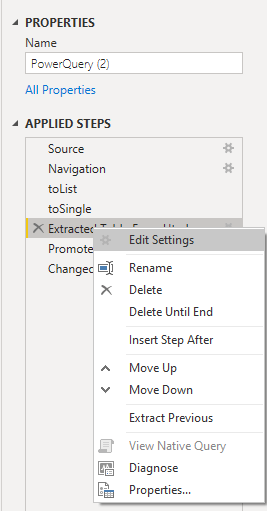
In the Applied Steps pane on the right, right click on the step called Extracted Table From Html and go Edit settings:
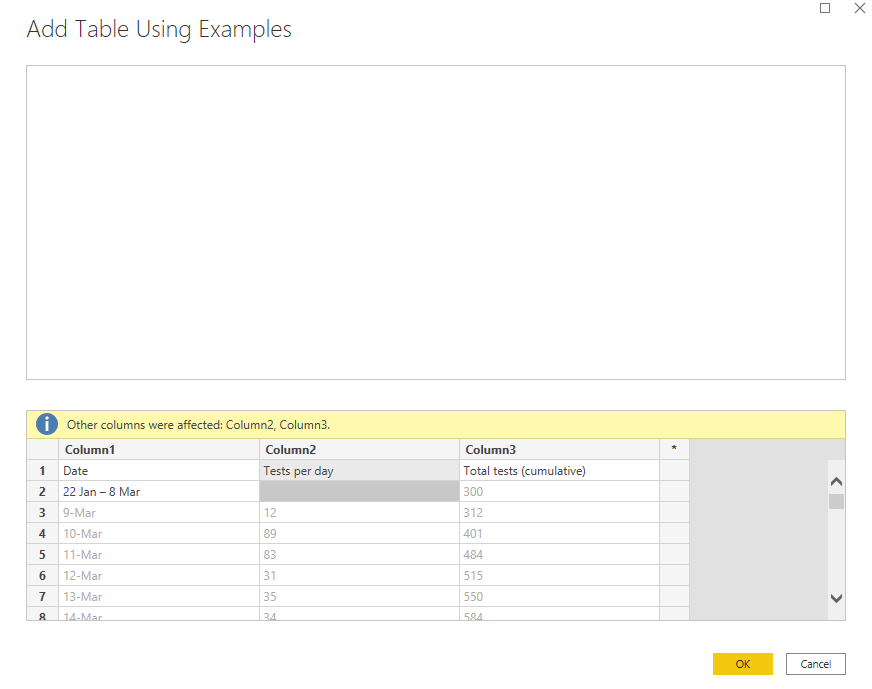
You’ll see a plain looking window called Add Table Using Examples, with a blank pane above and 3 blank columns below.
Now, you should have the source website up on another screen for this, it makes things much easier.
Look for the table in question in the source website.
Make sure the number of columns in the lower pane of Add Table Using Examples matches the columns in your website table. Mine is 3, you can add and remove columns with right click.
Double click in the white space in Column 1 row 1 and type the column header you’re looking for. Mine is Date

Likewise Column 2, and so on:

Now in Row 2, Column 1, find the first datum. It’s figured out the rest for me at this point, as you can see the data matches the website.
Click OK and then in the Applied Steps pane you can go to your last step, there will be a couple of automatic steps, Promoted Headers and Changed Type, but you may have done more yourself.

Now go back into the Advanced Editor of this query and have a look at the parameters of Html.Table. See how it’s different to those in the initial Web.BrowserContents query before we manually selected the data from examples

Copy the query from and including the line starting with toList to the end.
Next, go back to the flow where you grabbed the HTML and put it in SQL. Edit that flow and add a new step
The step is called Transform data using Power Query. You must connect with SQL authentication for this to work. If you use Azure AD authentication you will see a loading spinner forever.
Click Edit Query to load the Power Query Online Editor and navigate to the table you’re keeping the HTML data in.
Now we need to paste in the query from PBI Desktop. Click Advanced editor and paste in like so:
Remember to change the input of Table.ToList to #”Navigation 1″ and add a comma at the end of the line above.
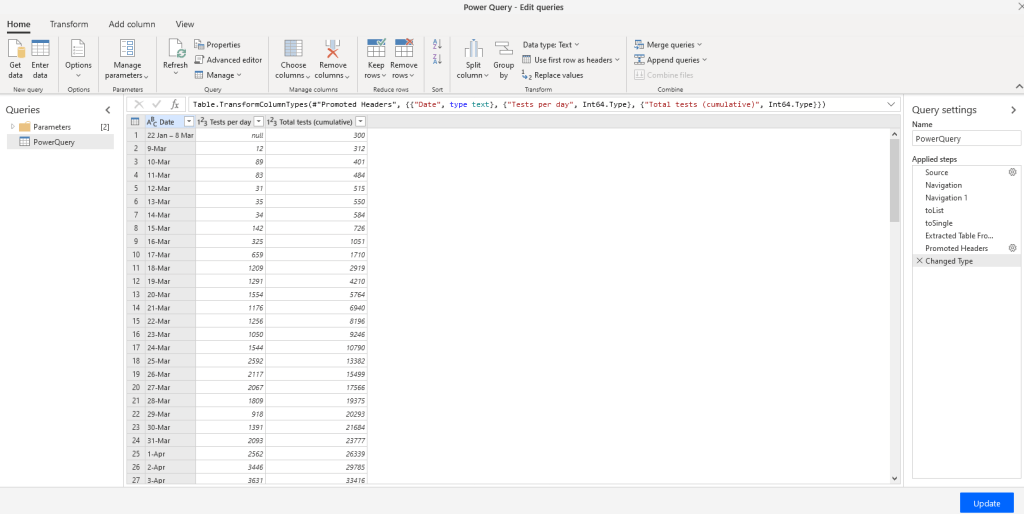
Click OK then and make sure you have a table:
Click Update then Save and run the flow:

Here is the table in the form on a JSON array.
Now every time this flow runs, it grabs the latest data from the website, stores it in a SQL table then uses Power Query to parse the data into JSON.
Useful huh?

1 Comment