
This guide is about processing inline attachments from emails and merging them back into the HTML body of the email. If you’re looking for how to send emails out with inline attachments, see here.
A possible use case here could be a help desk ticketing system. You receive emails from users that may have inline attachments such as error messages pasted from the snipping tool. These attachments are not visible if you simply view the email body from Power Automate in the Power Apps HTML Text control or the Rich Text Editor control.
It would be great if you could do that without switching to a separate tab or trying to view them in a gallery or via some other means and losing the context of where the image was placed in the message body. This guide will show you how.
Power Automate and Logic Apps both have a trigger for when an email is received. The trigger output includes the email body and optionally, attachments.
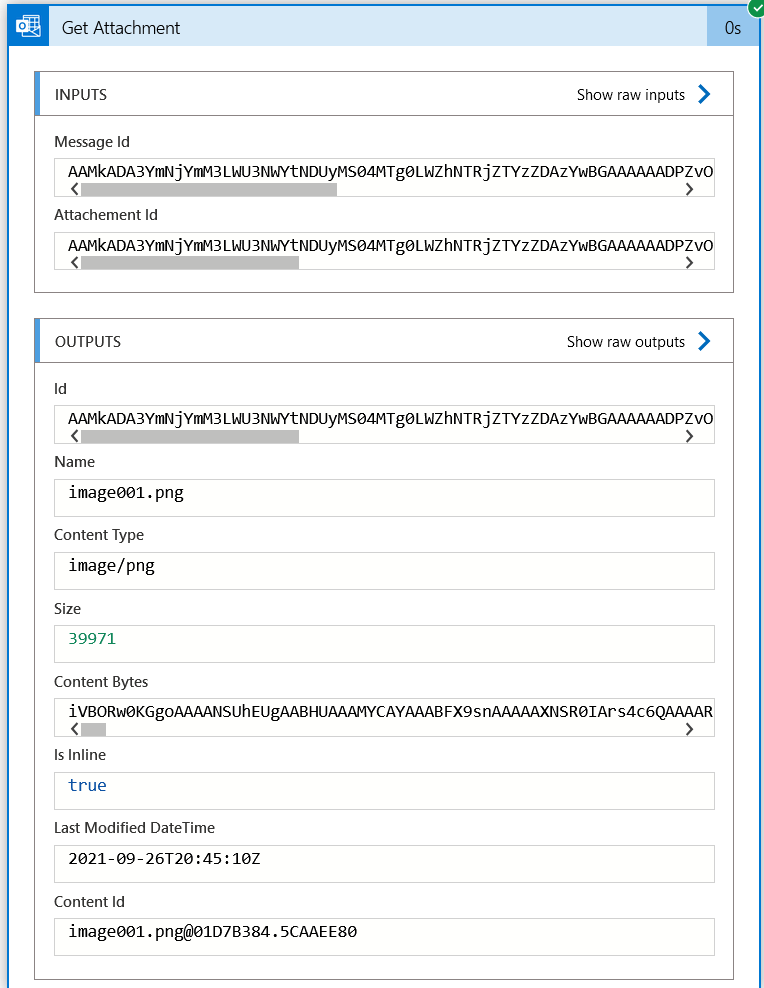
If you don’t choose to include the attachments in the trigger parameters you get get them later using the Get Attachment (V2) action.
If the email contains inline attachments (that is to say, the sender pasted an image directly from the clipboard into the Outlook compose email window), then the isInline property is set to true. Here is an example:
Now, if you look at the message body it will look like this at the place where the content was inserted:
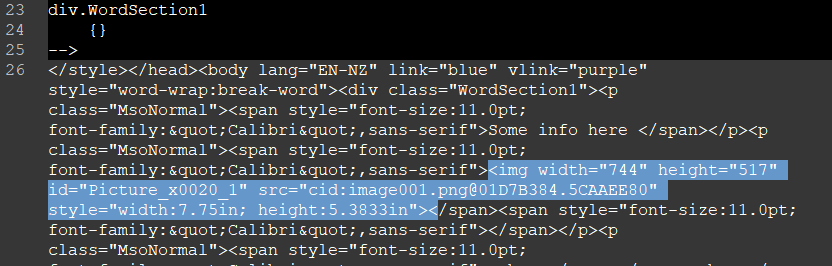
This information highlighted in blue tells email clients which attachment to look for to get the content. Outlook and other modern email clients do this well. You can see that cid:image001.png@01D7B384.5CAAEE80 corresponds to the contentID parameter of the attachment above.
For the the HTML Text or Rich Text control to display inline content, the base64 content must be either included in the data or the image data must be referenced via a URL. The following steps will show you how to include the content in the HTML text itself. If your data source is SharePoint then a Multiple lines of text column will handle quite a lot of images embedded in this way.
The format the HTML controls in Power Apps expect is like this; where cid:{contentID} was in the previous screen shot, there is now data:{content-type};base64 {contentBytes}:

We can deal to this with a simple replace() function.
At the top of your flow, initialise a string variable and put the email body from the trigger in its initial value:

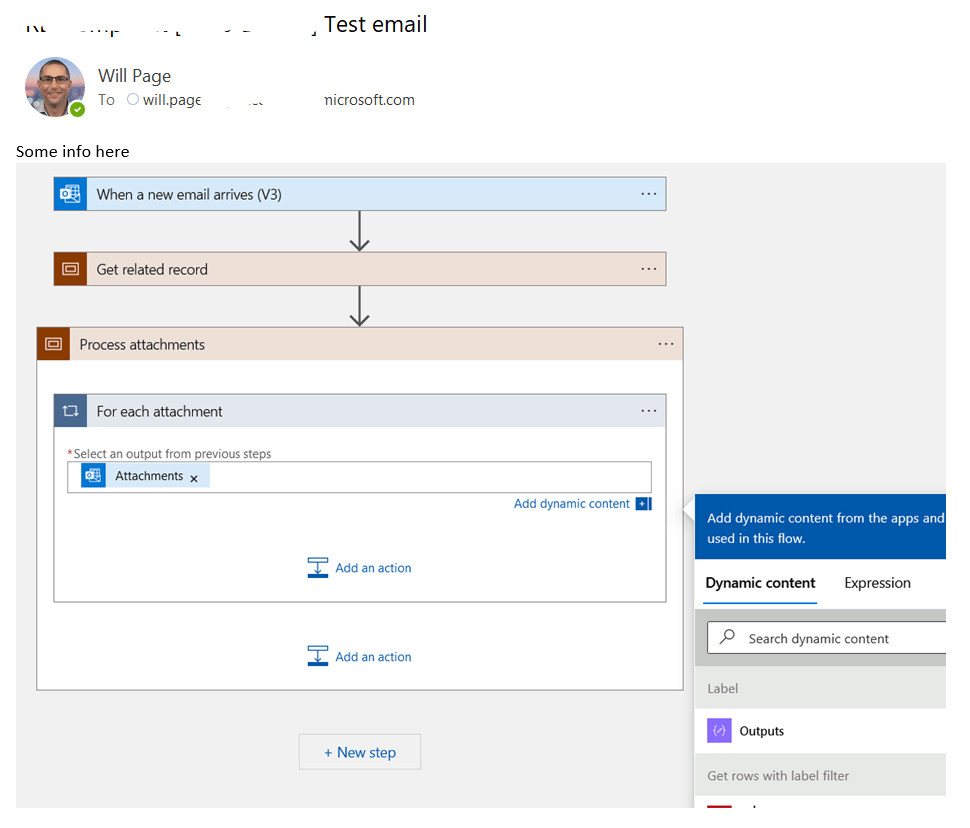
In your flow your Get Attachment step will be in an Apply to each (or For each in Logic Apps) loop. This will have been created automatically if you added the step then used dynamic content from the trigger in the inputs. Attachments are an array (even when there’s only one) so all this stuff happens within the loop. Because we’re setting a variable in the loop, set the concurrency to 1:


After your Get Attachment step, add a condition. The condition should be body(‘Get_Attachment’)?[‘isInline’] is equal to true. Do the next steps in the true branch. This just means we don’t bother processing normal attachments. It won’t fail if you try, but it’s a waste of your API quota.
Within the true branch of the condition, add a Compose with the following formula inside:
replace(
	variables('sBody'),
	concat(
		'src="cid:',
		body('Get_Attachment')?['contentId'],
		'"'
	),
	concat(
		'src="data:',
		body('Get_Attachment')?['contentType'],
		';base64, ',
		body('Get_Attachment')?['contentBytes'],
		'"'
	)
)
This expression is simply looking in the variable called sBody (remember this was initially set to the email body from the trigger) for a string with the format src=”cid:{contentID}” where {contentID} is the dynamic content from Get Attachment, then replacing it with src=data:{content-type};base64 {contentBytes} where {content-type} and {contentBytes} come from the Get Attachment action.
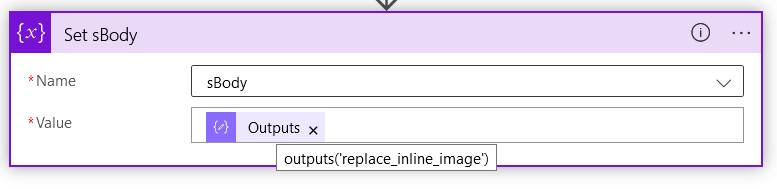
Lastly, set the string variable to the output of that Compose:
By the time your loop is finished, all the inline attachments are back in the HTML text. You can now save this variable into a multiple line of text column in SharePoint, an nvarchar(MAX) column in SQL or even a cell in an Excel table to view via those HTML controls in Power Apps.
Here is a screen shot of the Rich Text editor control in PowerApps showing the string “—–Original Message—–” concatenated with the message body with inline attachment from the email shown below:


This is not working for me. Inline images not shwoing
LikeLike
Thanks for your feedback.
LikeLike
Hi William,
Thank you for this tutorial!
I had to make some changes to the expression in the compose action to match my flow details. But once i did that it worked perfectly!!!!
I am building a ticketing system, I could get users to add their comment in powerapps using the rich text editor and save as plain text in sharepoint. but i wanted to give an option for users to reply back to an automated email. Your blogpost really helped me here.
The changes i made to the expression are here, i think it will be different for all users:
replace(
variables(‘sBody’),
concat(
‘src=”cid:’,
outputs(‘Get_Attachment_(V2)’)?[‘body/contentId’],
‘”‘
),
concat(
‘src=”data:’,
outputs(‘Get_Attachment_(V2)’)?[‘body/contentType’],
‘;base64, ‘,
outputs(‘Get_Attachment_(V2)’)?[‘body/contentBytes’],
‘”‘
)
)
LikeLike
I’m glad my work has helped you out. It looks like a V2 of the Get attachment action has superced the original action since I wrote this article.. Thanks for the heads up!
LikeLike
Hi,
Can you possible to post how to download and save the inline document from the mail?
LikeLike
Sorry it took me 5 months to approve your comment – it slipped past! The comment responses aren’t the best place for this because I can’t upload images here, so I’ll amend the article at some point if you still need this.
LikeLike
Hi,
Possible to post how to download and save the inline document from outlook?
LikeLike